I’m finally getting around to recapping the highlights of my Vida Vegan Con experience. VVC is a vegan bloggers conference in Portland, OR. Portland is really the perfect location for it because of its vegan mecca status and because it’s generally just such a wonderful, walkable city. I had a great time — balanced between conference going and family time and walking around Portland.
To back up a bit, I was so excited about VVC when I bought my ticket months and months ago, but felt less excited about going to VVC as the weekend approached. I’ve been finding blog writing really hard to keep up with lately because I’m doing *so* much other writing in my life. My days are literally filled with academic writing from the time I get up until I’m burnt out in the afternoon/evenings. And blog writing is the last thing I want to do on top of that. Even though it’s a very different kind of writing from the academic work I’m doing, the idea of sitting at my computer for one second longer than I have to is pretty unappealing. That being said, I think about the blog all the time and wish that I was being better at keeping up with it during this dissertation writing process. But I’m also trying to recognize that dissertation writing is a moment in time and I’ll come back around to being able to write more consistently on the blog when I’ve made some real headway through the dissertation process. We all have our ebbs and flows. I tried to go into the conference with that mindset — not apologetic for my decreased frequency posting, but open to potentially being inspired to blog more regularly again, and trying to be in acceptance of the ebb and flow of life, inspiration and time.
I went to lots of different sessions at VVC, but the ones that I found to be the best were interestingly photography-related. Attending the photography sessions made me think that photography might be a fun non-writing activity to focus on while writing the dissertation.
Food Styling with Hannah Kaminsky
This session by Hannah, of Bitter Sweet Blog, was so interesting. In real time, she styled a plate of pad thai. A lot of the food styling stuff is way beyond my patience — using eyedroppers to apply sauce to a cut-in-half sandwich, using a paint brush to brush soy sauce onto white/tan foods to make their color a little richer, throwing away and replacing wilted greens because the photo shoot has taken so long… I doubt that I’ll ever have the patience for that level of detail and time. I’m much more inclined to set up the shoot quickly (less than 5 minutes), take a bunch of photos (no more than 5 minutes), and EAT! That being said, it was amazing to see the amount of work and attention to detail that goes into a professional photo shoot to make the food look “just so.” One great take-away tip I got from this session was just how important it is to set up your scene well before hand, so that when the food is ready, you just have to add it and take the photos. Food generally starts to look less and less appetizing the longer it’s been sitting around, so timing is key. The other trick I thought I might actually use is to have a spray bottle to spritz water onto some foods to give them that fresh, just picked and washed look (for berries, etc.). I’ve followed Hannah’s blog for a long time, so it was so cool to see her in action!
Advanced Photography with Susan Voisin
This session was awesome. Susan Voisin writes the blog Fat Free Vegan Kitchen and put together this PDF of her PowerPoint from the conference. So nice to have it all here in one spot.
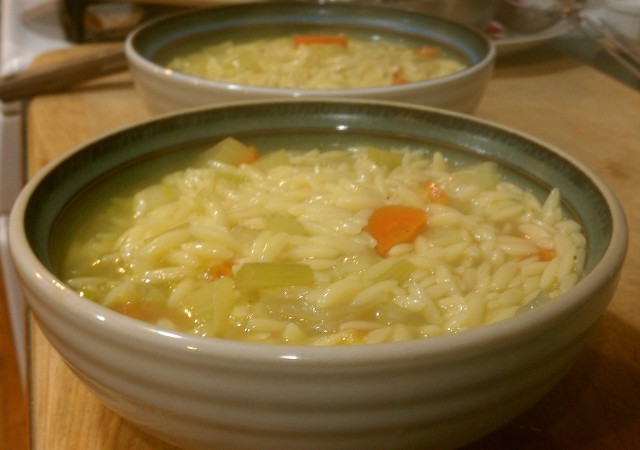
Susan was such an inspiration. She is self-taught, takes wonderful photos, and is such a warm and friendly public speaker. It was an absolute joy to attend her session. And I learned so much, too! The fact that Susan is self-taught was inspiring to many in the room, I think. I know I felt a rush of possibility for my own growth as a photographer when she shared that she had not had formal training. I took a few photography classes back in high school, but that was in the days of dark rooms and I honestly couldn’t tell you a single thing I learned in those high school classes (because I can’t remember, not because they weren’t great!). During her session, she showed us some of her photos when she first started photographing food, and then some of her recent shots. It made me want to look back at some of my first blog photos. Here’s a shot from the very beginning of the blog in 2011, when I was using my Android smartphone to take all the pictures in our kitchen (which has pretty bad lighting) for the blog:
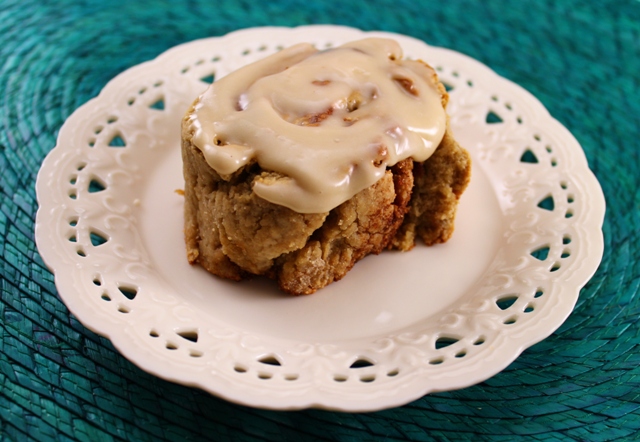
And then there’s this one from last week that I shot with a Canon Rebel T3i in the lightbox:
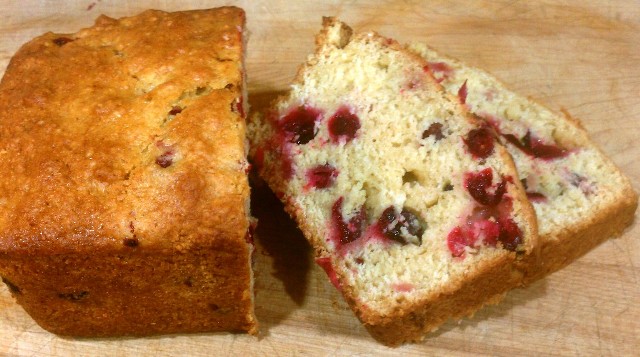
Both foods — the soup and the cinnamon roll — are really monochromatic and not pretty at all on their own, so I thought they might be an interesting comparison. Amazing what a difference the colorful background makes in the cinnamon roll photo, don’t you think? Now here are two that are literally the exact same recipe for Cranberry Orange Bread. First with the phone camera in the kitchen:
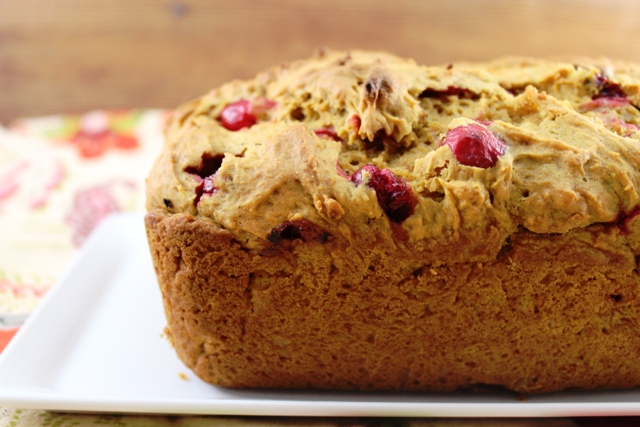
Second, in the lightbox with the Canon:
And another way to photograph a loaf of bread which I like a bit better:
After the photography tips I brought home from VVC, I can see that each of the lightbox/Canon photos still have A LOT of room for improvement, but it’s so fun to look back at the improvement over the last couple of years, just through trial and error, and imagine next steps in exploring food photography.
Expert Corner with Marika Collins and Kate Lewis
The Expert Corner at VVC is such a great thing — basically there was a schedule of individual experts on various subjects available for blocks of time throughout the conference. You could just walk up, sit down, and have one-on-one time to ask questions/talk. I ended up chatting with Marika Collins, whose website is Marika Collins Photography and her blog is Mad Cap Cupcake, and Kate Lewis, whose website is Kate Lewis Photography and whose blog is Le Chou Sauvage, for probably close to 45 minutes and they were so helpful. I pulled out my camera and they gave me tips on everything from different settings to try, to lighting, to what lens I might want to invest in next (and what was the best deal in terms of what you get for the price). In case you’re interested, for the Canon Rebel T3i, they recommended the Canon 50mm f/1.8 lens. I plan to squirrel that info away for a rainy day! Thanks for the time, info and inspiration, ladies!
Take Away Tips from VVC Photo Sessions
There was so much great information from these various photo experts that I’m not going to recap here, mostly because I have unfortunately lost (hopefully just misplaced) my notebook with my notes in it from VVC. Damn! Anyway, here are the things I remember:
- Lighting. When I first started the blog, we had these terrible yellowish lights in the kitchen (our kitchen has almost no natural light), so I quickly changed those to full-spectrum daylight energy saving bulbs. Then the next step in lighting was the lightbox, which made huge improvements. What I took away from VVC, though, was to get out of the lightbox and into the natural light. Marika and Kate suggested finding one window (even if it’s in the bedroom or the bathroom) that gets good natural light. Susan showed us her set up, which is a cart on wheels that she positions in front of her dining room window. She added window film sticky stuff from Home Depot to the windows to diffuse the light, but you can use anything from a sheer curtain to something sheer held up in front of the window just for the photo shoot. There’s a great picture of her set up in the PDF I mentioned above. Check it out.
- Reflectors. To reflect the light coming in the window and get some light coming in on the back of the food, you can position reflectors opposite the window. You can buy silvery reflectors with stands, etc. Or you can just use white foam board propped up near the food.
- Tripod. I actually already have a tripod (an awesome Goodwill score — $20 for a practically brand-new $200 tripod), but I rarely use it. After VVC, I’m definitely going to pull out the tripod more often and try it out. If you don’t have a tripod, you can improvise with a stack of books, or by resting it on any stable thing you can find.
- Backgrounds. Backgrounds can really help make a photo special. You should think carefully about what kind of background will work. If the food is really colorful and textured, you might want a much more plain background and, perhaps, a white plate. If the food is monochromatic and lacks interesting texture and color, you might want a plate or background with a colorful print or texture. Backgrounds can include placemats, linens, handmade paper, old fence boards, wood, metal, etc. Susan has a series of wood panels that she has painted and treated to give her lots of options for “table tops.” She also snagged some fence boards when an old wood fence was being torn down. These were especially beautiful with the treated wood. Lots of times, backgrounds can be found for free or at thrift shops or salvage yards for not very much money at all.
- Photo-a-Day Challenges. Marika and Kate suggested this as a way to improve your photography immensely. Taking a photo every day for a year and posting it as a photo journal sounds like such a fun project. 365 photos in 365 days would really force you to try out new things with the camera and get creative with photo shoots. I would love to try this. Has anyone done one of these challenges before?
- Props. Along with backgrounds, props can really liven up a photo. Interesting utensils, cake plates, pitchers, etc. Any food related items that make sense with the photo. These can be collected over time at thrift shops, Goodwill, antique shops, etc. Ideally, you would use them for your day-to-day life, too!
- Storytelling. Your photo should tell a story. What do you want the viewers to feel? What do you want them to take away? Is that piece of cake part of a birthday party or celebration? Is that dinner your 20th anniversary meal, made at home for the person you love? Is that iced tea enjoyed on a lazy summer afternoon in the backyard?
- Editing. Before the conference, I hadn’t really understood the level of improvement you can get by editing a photo using editing software. It’s amazing! I’m definitely going to consider checking out an editing program like Lightroom or Photoshop.
So that’s my VVC recap for this year. It was great to meet new people, see people whose blogs I follow, and learn new things about taking my food photography to the next level!
Follow me on Facebook, Instagram, Pinterest and/or Twitter.


 Follow

Awesome write up! I miss VVC 🙂 Keep up the awesome work. You have a good eye, which is a hard thing to teach—all the technical stuff will come in time 🙂 I particularly like the cranberry bread shot with the slices. Yum!
Thanks, Marika! It was such a pleasure to meet you and I’m already enjoying following your blog and Instagram! Thanks for all the great pointers! 🙂
Thanks for sharing this ! I wish I could be there. Next time, I will bring some vegan bloggers from Montreal with me. The photo tips are very useful.
Thanks, Christiane! It would be great to have a contingent of Montreal bloggers at VVC! Definitely let me know if you’re planning to go for the next one — it would be great to see you again! 🙂
How am I just now discovering your blog?? I was at VVC as well and it was wonderful. But I am beginning to realize how many people I DIDN’T get to meet though, sadly. Your blog is lovely!
Thank you so much! I have really been enjoying reading Luminous Vegans (I can’t remember how I stumbled upon it, but so happy I did). And I know what you mean about VVC and not meeting so many people who were there…Next time, I suppose!