I grew up eating challah on special occasions (those being when my mom felt like making it, or when we would buy a loaf on Fridays from one of the local markets). Challah is a Jewish braided bread eaten on holidays and Shabbat (the Sabbath). This year Hanukkah begins the day before Thanksgiving and lasts till the following Thursday. If you’re going to Hanukkah or a Hanukkah/Thanksgiving hybrid (or hosting one of your own), this is a lovely celebratory thing to make for the occasion.
The one time I tried to make challah on my own was before we went vegan. I used a traditional recipe with eggs and everything and had such high hopes for a great loaf of bread. That bread was so dense and hard, it could have been used as a weapon. I have a problem with yeast. In other words, every time I use it, I kill the yeast with water that’s too hot, I let it rise too long and it collapses on itself, etc. Whatever can go wrong with yeast, I’ve done it. Last month, we had a bunch of friends over for brunch and I made cinnamon rolls and killed the yeast FOUR times. Yup. I actually had to go the store right before everyone was arriving to buy new yeast because my four attempts had used the last of it. At the eleventh hour, I used a thermometer and it worked out great. Go figure.
In spite of this disastrous history with yeast, I keep trying. It shouldn’t be that hard, right? I say all this not to make bread-making sound intimidating, but because I’ve figured out two things that have helped me make successful yeast dough: a thermometer and a kitchen timer. The thermometer helps you test the heat of the water to avoid killing the yeast with water that’s too hot. The kitchen timer keeps you from forgetting the yeast mixture and the dough for too long. If you have issues like me, use these tools and bread-making should not be hard at all! If you can make a good dough without these tools, congratulations. Give yourself a pat on the back. Seriously, go ahead. You’re a rock star in my eyes.
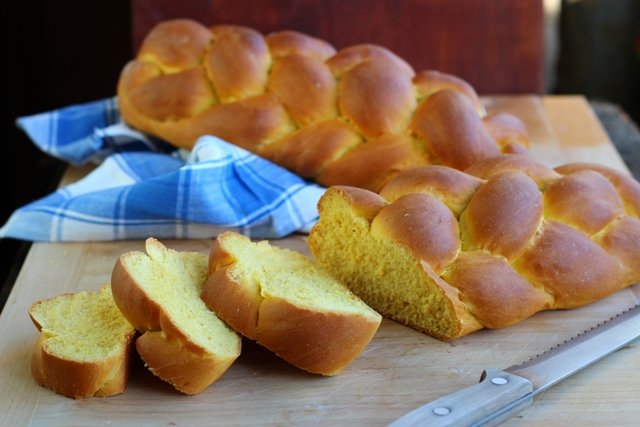
Traditionally, challah is made with lots of eggs and has a slight yellowish tint to it as a result. The top is shiny, the result of an egg wash before baking. I’ve always loved challah — to eat plain, to toast with a little butter and/or jam, and to make challah French toast. You really haven’t lived until you’ve had challah French toast. It is a whole other thing entirely. This recipe is a vegan version of challah, using pumpkin as an egg replacer that gives the loaves that yellowish tint and nice deep golden brown crust. In every other way, this is just like the challah I grew up eating. Dense and fluffy, rich and flavorful, and it fills the house with the most extraordinarily delicious aroma.
The Recipe
Makes 1 large loaf or 2 small loaves
1 1/2 TBLS active dry yeast
2/3 CUP warm water (around 108-110° F)
4 TBLS sugar
1/2 CUP nondairy milk + 1 TBLS
2/3 CUP pumpkin
1/4 CUP coconut oil
4 CUPS all purpose flour (more for dusting)
1 TSP salt
In a mixing bowl, add 1 TBLS of sugar and the yeast. Add warm water and whisk together briefly. [IMPORTANT: To be safe, make sure your water is right around 110° F, but not over. Water that is too hot kills yeast.] Let the yeast mixture sit in a warm (NOT HOT!) spot for 10-15 minutes until nice and puffy. While that mixture is rising, heat the soy milk, coconut oil, the remaining 3 TBLS sugar and salt in a small saucepan. Stir to dissolve the sugar, and heat just until the oil is melted. Turn off the heat. Stir in the pureed pumpkin until fully combined. This mixture should be warm, not hot. Use a kitchen thermometer to verify that it’s not above 110°F. Stir this mixture into the yeast mixture when it has risen with a wire whisk. Whisk in the flour a little at a time. Switch to a wooden spoon or stiff spatula when the whisk becomes impractical. You want the dough to be soft but not sticky. This may require a little more or less than 4 cups of flour total. Knead with your hands for about 5 minutes in the bowl or on a floured surface and then place the dough back in the mixing bowl. Cover the bowl with a clean dish towel and then set the bowl in a warm place to rise (again, warm — NOT HOT!). You want the dough to more than double — maybe even triple — in volume. This should take 40-60 minutes. When the dough has risen, knead it in the bowl, kneading in a little extra flour if the dough has become too sticky.
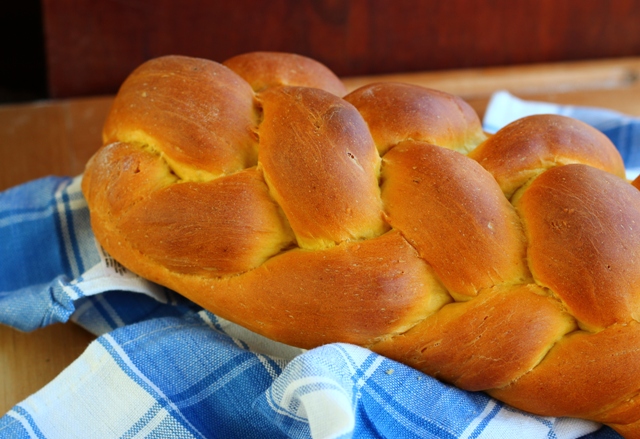
To make the loaves: If you’re making one large loaf, cut the dough with a sharp knife evenly in 6 pieces. If you’re making two smaller loaves (which I think is actually preferable because they’re easier to manage), cut the dough in 12 pieces. NOTE: these instructions are for a 6-strand braid. If you prefer a 3 strand braid, adjust the numbers above to divide each loaf into three pieces. The 6-strand braid is beautiful and, while it’s a little complicated to get the hang of, I found this great YouTube video that shows you how to do it. Watch the video once or twice before trying to do the braid to get the idea.
When the loaves are formed, place them gently on a baking sheet (either nonstick or with a little coconut oil on the pan). Brush the tops of the loaves lightly with the 1 TBLS of soymilk or other nondairy milk. Cover gently with a clean dish towel and place in a warm (NOT HOT!) place to rise. Let rise for 30-45 minutes. Near the end of the rising time, preheat the oven to 400° F and bake. Baking time is 20-25 minutes if you’re making two smaller loaves, or 35-40 for a large loaf. The loaves are done when they are a beautiful deep golden brown and they sound hollow when you knock on them with your knuckles.
Bon appétit! Any questions, don’t hesitate to let me know!

Find Serenity in the Storm on Facebook, Instagram, Pinterest and/or Twitter.
 Follow

Katie this looks awesome! I didnt realize this was your website! Cant wait to see what you post next!
Hi Dawn!! Thanks so much for commenting! I hope you’re doing well! 🙂
Your challah looks amazing! I just might make some for next week!
You definitely should! 🙂
K–one way to get around that second issue (overrising) is to use dramatically less yeast (1/4 tsp) and longer rise times.. I find it easier to work into my day, ( mix in the morning, shape when i get home, bake after dinner) and there is ALOT more room for fudging it on the timing ( by as much as an hour or two or even more).
Leonie — Wow, thanks!! I totally forgot you’re the master bread-maker. Thanks for the tip. I like the sound of this. 🙂
You are genius! This looks amazing! I had all but given up on doing anything for Thanksgiving this year, but now I’m inspired. Will be around for the entire holiday season – yay! Let’s make a date!
Oh, and I kill the yeast EVERY.TIME, too 🙂
The thermometer does wonders. Seriously. 🙂 Yes! Let’s make a date! I’ll email you.
Good bread!
Glad you liked it. <3
I specialize in making challahs, and I have to say – you’ve done a wonderful job!!
This is a beautiful challah, braided perfectly
Thanks so much, Winnie! The first couple of tries looked awful, but once I got the hang of the braid pattern, it was actually fun. Makes me wish I had long hair again so I could braid my hair in a six-strand braid! 🙂