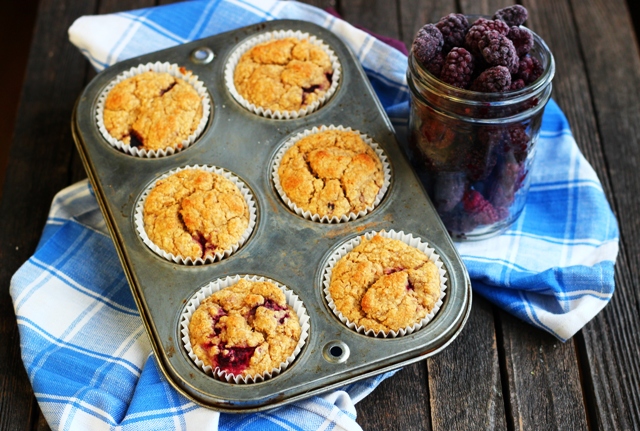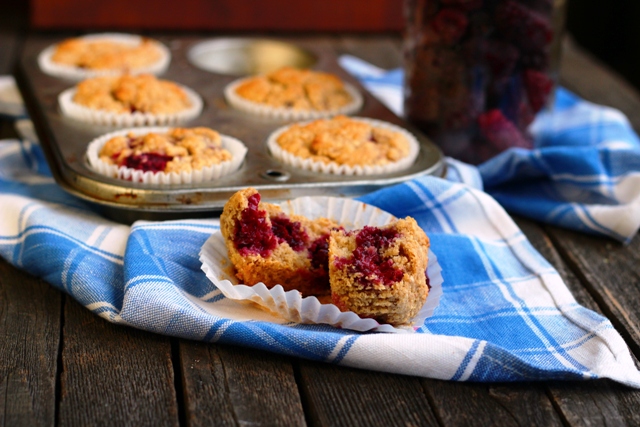
Marionberry-Blackberry Corn Muffins (Gluten-free)

IMG_6662

I’ve been pretending today is Saturday. The cold below-freezing weather in Seattle has given way to rain and, in the spirit of a damp Saturday morning, I decided to make some gluten-free corn muffins. It’s always so cozy to have the oven on and something baking on a dreary December day. These would be a great weekend brunch item. You can use any kind of berries for this recipe, and though we are not in berry season right now, I have been having a blast going through the frozen berry section at our local grocery store. Marionberries, blackberries, blueberries, raspberries. A little burst of summer snuggled up in a comforting corn muffin.

The Recipe

Makes 6 muffins

1/2 CUP corn flour

1/2 CUP gluten free flour (I used Bob’s Red Mill GF All-Purpose Baking Mix)

2 TSP baking powder

1/4 TSP cinnamon

2 TBLS sugar, or alternative sweetened (maple syrup, agave, etc.)

1 CUP mixture of marionberries and blackberries (or any berry would be great!)

1/2 CUP applesauce

1 TSP vanilla

1/2 CUP coconut milk (I used light, canned coconut milk, but other nondairy milk would be fine)

Preheat oven to 400 F. Mix the dry ingredients in one bowl (toss the berries into the dry ingredients) and the wet ingredients in another bowl. Mix the wet ingredients into the dry ingredients, stirring only until combined. Grease muffin pan with some coconut oil, or use cupcake papers for a completely oil-free recipe. Bake for 20-25 minutes, until toothpick comes out clean.

IMG_6687

Find Serenity in the Storm on FacebookInstagramPinterest and/or Twitter

Hauntings

It’s a rare individual who is not haunted in some way. Haunted by memories of things we could have done differently. Times when we could have been kinder, could have said something different that might have changed the way things happened. We are haunted by memories of people and animals we’ve lost. Haunted by the changing landscape and ecosystem around us. Haunted by the violence we’ve committed throughout our lifetimes no matter how small and seemingly insignificant. These hauntings leave traces. Resonances. Specters in the night.

Mine visit in the wee hours of the morning. I wake at 3 am or 4am, well before light, and lay there in bed thinking of the specters that haunt me. These specters are not frightening. No. They’re familiar — like ghostly old friends. Quiet and sad. As I walk with the dogs through the quiet streets in the early morning fog, these specters are there with me and I acknowledge them and make my silent apologies.

These walks are a sort of meditation. With each step in the early morning darkness, I apologize and I make a quiet commitment to try to move through the day without doing harm.  Without performing those subtle acts of violence — giving into anger, frustration, anxiety. Many days I fail. No, most days I fail.

I’ve been thinking about religion lately, mostly the acts of confession and forgiveness. I’ve been thinking about this notion that by acknowledging the harm we’ve done, by atoning for it in some way, we find forgiveness. I think the role of god in this forgiveness process is to forgive us when the people in our lives can’t. So that we can have some closure. I’m not a believer in god per se, so forgiveness, particularly from people or animals who are dead and gone, does not come easily — from god or anyone else.

Forgiveness involves a letting go. Or maybe, more precisely, it involves letting go of feeling guilty for what you’ve done. For me, I don’t think I can let go of those actions, the mistakes I’ve made, the loved ones I’ve lost. They are there — all of them — quiet in the darkness of the morning. They fade into the background in the light of day, to return just before dawn as my solemn companions. My reminder to move through the day thoughtfully and gently.

Pints for Pigs Peace!

1471340_10152014992311866_1979556720_n

Okay folks, get ready to have some fun! You won’t want to miss this awesome fundraising event if you’re in or around the Seattle area on January 11, 2014. The lovely Anika over at the Vegan Score blog and I are hard at work organizing Pints for Pigs Peace (benefitting Pigs Peace Sanctuary and the Northwest Animal Rights Network (NARN)). Held at Central Cinema in Seattle’s Central District, the afternoon will be packed with a pig-themed double-feature: Babe and a documentary about the work of Pigs Peace Sanctuary. Available for purchase at the theater will be vegan beer and wine, awesome non-alcoholic drink options, an all-vegan food menu, a sweet prize drawing and some limited edition treats. Make sure to get your tickets soon before they sell out! This is a kid-friendly event (how could it not be with the now-classic Babe on the big screen?), so bring the whole family for an afternoon of pig-themed fun!

BUY TICKETS HERE!

Feel free to let me know if you have any questions. We hope to see you there!

Whipped Coconut Cream

IMG_6589

I’m way behind on the whipped coconut cream thing. I had it for the first time recently on top of an apple pie-ish dessert when my mom was visiting earlier this month and we went out for dinner. I’d seen it sweep the blogosphere over the last few years, but had never gotten it together to try it out. Oh my goodness, this stuff is delicious. And so easy to make. A perfect topping for pie or whatever else you can dream up to use as a vessel for eating whipped cream.

The Recipe

1 can full fat coconut milk (or coconut cream)

1-2 TBLS maple syrup or vegan powdered sugar

1 TSP vanilla extract

Chill the can of coconut milk in the fridge for at least 2-3 hours (overnight is great). Place a metal mixing bowl in the freezer ahead of time (at least 20-30 minutes). Open the can of coconut milk and scoop out just the solid white coconut cream from the top. You can save the clear liquid for later and use in something else. Add the coconut cream, sweetener and vanilla to the chilled mixing bowl and beat with electric beaters on high, moving the beaters around the bowl evenly until the mixture is light and fluffy like whipped cream.

Serve on top of pie, vegan ice cream sundaes, fresh cut fruit, or simply enjoy it with a spoon!

Find Serenity in the Storm on FacebookInstagramPinterest and/or Twitter

Pierogies, Pierogies! A Review of Fire & Earth Kitchen

IMG_6494

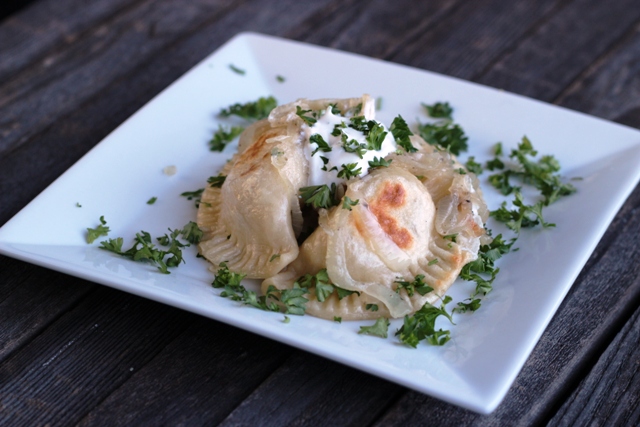
Guess what I spent the afternoon making yesterday? Okay, so it’s not hard to guess. Pierogies!

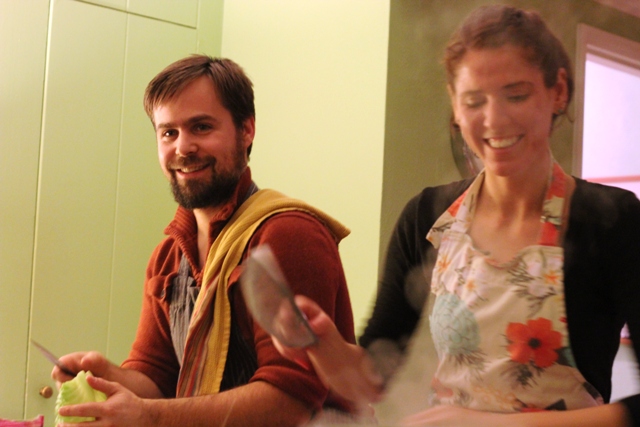
Pierogies are eastern European potato dumplings, and can come with a range of fillings and toppings. When I was a kid, my mom used to buy pierogies from these Polish church ladies who would periodically make them, pack them up by the dozen in Chinese food takeout containers, and sell them to the community. They came with a little container of caramelized onions swimming in butter. We would fry them up in the butter and onions and eat them all immediately. Man oh man, were those pierogies good. You can imagine my delight, then, when Renee Press from Fire & Earth Kitchen contacted me and invited me to attend one of her cooking classes. When I saw there was one called “Pierogies, Pierogies!” I was in! Eric and I went together to the class which was held in the home Renee shares with her partner, Nick.

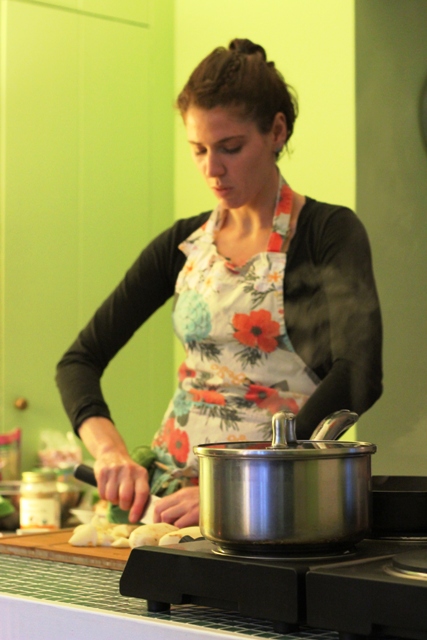
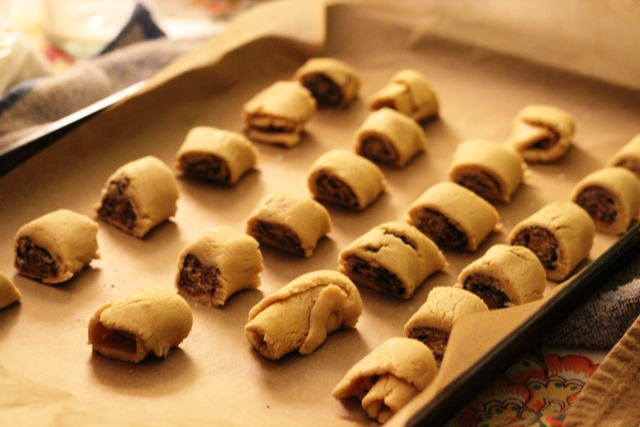
Fire & Earth Kitchen offers cooking classes, food coaching, and chef services. All of the food is vegan and gluten-free and Renee is very sensitive to the needs of people with those and other food preferences and allergies. The menu for the evening included: potato and onion pierogies, a beet tart with sunflower ‘goat cheese’, stuffed cabbage rolls, and chocolate cinnamon rugelach (cookies). The class lasted 2 1/2 hours and I was completely impressed by how Renee managed to fit four fairly labor-intensive dishes into that amount of time. We watched her demonstrate how to make the dishes and then got to taste each one as it was ready. The class was held in Renee and Nick’s living room with a countertop and stovetop set up as a work station. We all sat in the living room and watched the cooking and Renee invited us up to get a closer look at anything and try certain techniques if we wanted to, in order to ensure that we understood how to make them.  

IMG_6217

Renee is a wealth of information and talked while she cooked, explaining what she was doing, as well as some general information about ingredients, cooking methods, etc. I learned that most of the nutritional value in an onion is in that layer just under the papery skin and that it’s worth it to take the extra time to peel the papery layer off, leaving the one just underneath. Renee share with us that cooking in a cast iron pan is a great way to get some added iron in your diet and that acidic foods, like tomatoes, are particularly effective at drawing out the iron from the pan. After you chop garlic, you should let it sit for 5-10 minutes before cooking it because the exposure to the air helps it release its immune system-boosting properties. Renee shared tons of little insights like these while she cooked.

I was amazed by the way Renee and Nick worked together as a team. They are both warm and friendly, professional, extremely organized, and their communication working together is great. Nick scurried around making sure Renee had all the utensils, pots, pans, dishes and ingredients she needed, he tended the fire that crackled cheerfully in the fireplace, and he jumped in to help with the food prep as was needed.

IMG_6224

All the dishes were beautiful and I came away with some great inspiration to make these and variations on them. One of the things I appreciated most about the class was getting to see Renee work with gluten free dough in various dishes (the pierogies, rugelach and tart). She explained that gluten free dough will crack apart (a problem I have frequently!) if you don’t have enough water. Rather than pouring a little extra water into the dough, she suggested wetting your hands with a little water and kneading it in. She said that was almost always the right amount of water and wouldn’t make a sticky, over-watered mess. My favorite dish of the night was the rugelach, a chocolate cinnamon cookie that you couldn’t even tell was gluten free at all. It was so good.

IMG_6240

I loved the whole class and can’t wait to sign up for another one. If you’re in the Puget Sound area, there are still some spots available for the January 5 ‘Pierogies, Pierogies!’ class. There’s also still room for the ‘Dreamy Desserts’ class on December 1. 

I hadn’t attending a cooking class since I worked for a cooking school/catering company when I was a teenager and it was so fun to learn new dishes and cooking skills in the warm, cozy environment of Fire & Earth Kitchen. Have any of you ever taken a cooking class?

Challah (Braided Bread)

IMG_6408

I grew up eating challah on special occasions (those being when my mom felt like making it, or when we would buy a loaf on Fridays from one of the local markets). Challah is a Jewish braided bread eaten on holidays and Shabbat (the Sabbath). This year Hanukkah begins the day before Thanksgiving and lasts till the following Thursday. If you’re going to Hanukkah or a Hanukkah/Thanksgiving hybrid (or hosting one of your own), this is a lovely celebratory thing to make for the occasion.
IMG_6388

The one time I tried to make challah on my own was before we went vegan. I used a traditional recipe with eggs and everything and had such high hopes for a great loaf of bread. That bread was so dense and hard, it could have been used as a weapon. I have a problem with yeast. In other words, every time I use it, I kill the yeast with water that’s too hot, I let it rise too long and it collapses on itself, etc. Whatever can go wrong with yeast, I’ve done it. Last month, we had a bunch of friends over for brunch and I made cinnamon rolls and killed the yeast FOUR times. Yup. I actually had to go the store right before everyone was arriving to buy new yeast because my four attempts had used the last of it. At the eleventh hour, I used a thermometer and it worked out great. Go figure.

In spite of this disastrous history with yeast, I keep trying. It shouldn’t be that hard, right? I say all this not to make bread-making sound intimidating, but because I’ve figured out two things that have helped me make successful yeast dough: a thermometer and a kitchen timer. The thermometer helps you test the heat of the water to avoid killing the yeast with water that’s too hot. The kitchen timer keeps you from forgetting the yeast mixture and the dough for too long. If you have issues like me, use these tools and bread-making should not be hard at all! If you can make a good dough without these tools, congratulations. Give yourself a pat on the back. Seriously, go ahead. You’re a rock star in my eyes.

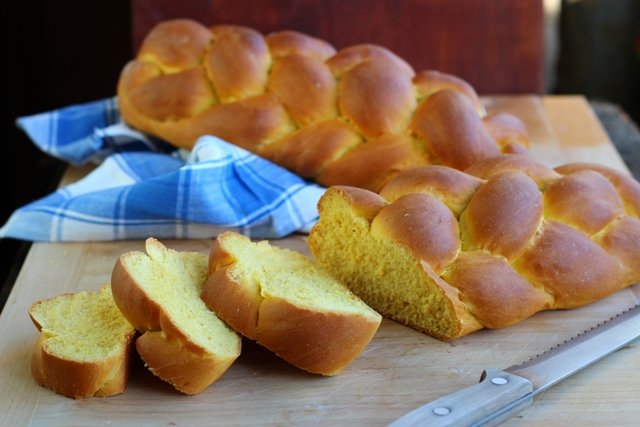
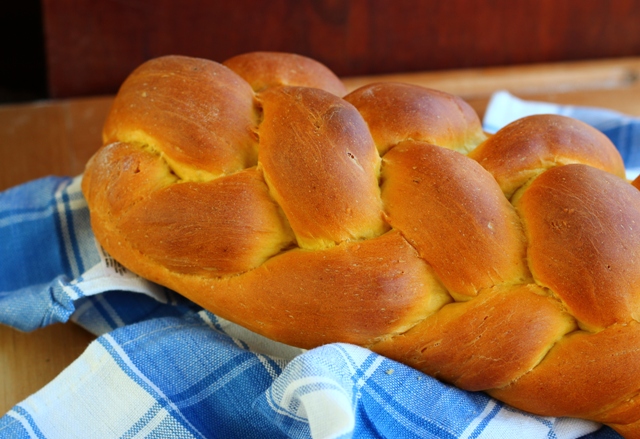
Traditionally, challah is made with lots of eggs and has a slight yellowish tint to it as a result. The top is shiny, the result of an egg wash before baking. I’ve always loved challah — to eat plain, to toast with a little butter and/or jam, and to make challah French toast. You really haven’t lived until you’ve had challah French toast. It is a whole other thing entirely. This recipe is a vegan version of challah, using pumpkin as an egg replacer that gives the loaves that yellowish tint and nice deep golden brown crust. In every other way, this is just like the challah I grew up eating. Dense and fluffy, rich and flavorful, and it fills the house with the most extraordinarily delicious aroma.

The Recipe

Makes 1 large loaf or 2 small loaves

1 1/2 TBLS active dry yeast

2/3 CUP warm water (around 108-110° F)

4 TBLS sugar

1/2 CUP nondairy milk + 1 TBLS

2/3 CUP pumpkin

1/4 CUP coconut oil

4 CUPS all purpose flour (more for dusting)

1 TSP salt

In a mixing bowl, add 1 TBLS of sugar and the yeast. Add warm water and whisk together briefly. [IMPORTANT: To be safe, make sure your water is right around 110° F, but not over. Water that is too hot kills yeast.] Let the yeast mixture sit in a warm (NOT HOT!) spot for 10-15 minutes until nice and puffy. While that mixture is rising, heat the soy milk, coconut oil, the remaining 3 TBLS sugar and salt in a small saucepan. Stir to dissolve the sugar, and heat just until the oil is melted. Turn off the heat. Stir in the pureed pumpkin until fully combined. This mixture should be warm, not hot. Use a kitchen thermometer to verify that it’s not above 110°F. Stir this mixture into the yeast mixture when it has risen with a wire whisk. Whisk in the flour a little at a time. Switch to a wooden spoon or stiff spatula when the whisk becomes impractical. You want the dough to be soft but not sticky. This may require a little more or less than 4 cups of flour total. Knead with your hands for about 5 minutes in the bowl or on a floured surface and then place the dough back in the mixing bowl. Cover the bowl with a clean dish towel and then set the bowl in a warm place to rise (again, warm — NOT HOT!). You want the dough to more than double — maybe even triple — in volume. This should take 40-60 minutes. When the dough has risen, knead it in the bowl, kneading in a little extra flour if the dough has become too sticky.

To make the loaves: If you’re making one large loaf, cut the dough with a sharp knife evenly in 6 pieces. If you’re making two smaller loaves (which I think is actually preferable because they’re easier to manage), cut the dough in 12 pieces. NOTE: these instructions are for a 6-strand braid. If you prefer a 3 strand braid, adjust the numbers above to divide each loaf into three pieces. The 6-strand braid is beautiful and, while it’s a little complicated to get the hang of, I found this great YouTube video that shows you how to do it. Watch the video once or twice before trying to do the braid to get the idea.


When the loaves are formed, place them gently on a baking sheet (either nonstick or with a little coconut oil on the pan).  Brush the tops of the loaves lightly with the 1 TBLS of soymilk or other nondairy milk. Cover gently with a clean dish towel and place in a warm (NOT HOT!) place to rise. Let rise for 30-45 minutes. Near the end of the rising time, preheat the oven to 400° F and bake. Baking time is 20-25 minutes if you’re making two smaller loaves, or 35-40 for a large loaf. The loaves are done when they are a beautiful deep golden brown and they sound hollow when you knock on them with your knuckles.

Bon appétit! Any questions, don’t hesitate to let me know!  
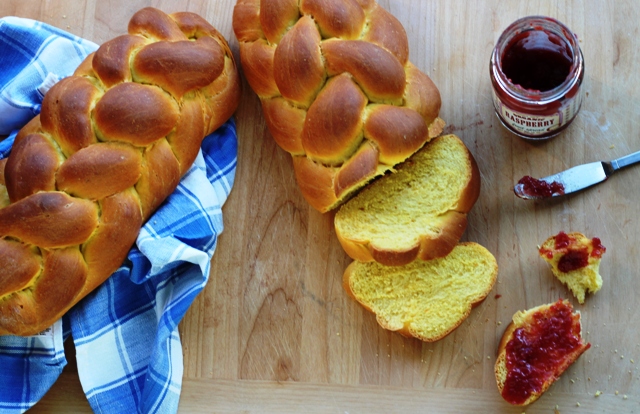
IMG_6448

Find Serenity in the Storm on FacebookInstagramPinterest and/or Twitter

New Article Published at ‘Gender, Place & Culture’

Usually, I stick with the non-academic subjects on the blog, but occasionally I like to share the academic work I’m doing. In addition to working on the dissertation, I’ve also been working on some publishing projects: a few articles and two different edited book projects. Recently, an article of mine just came out at the feminist geography journal, Gender, Place and Culture.

Sexualized Violence and the Gendered Commodification of the Animal Body in Pacific Northwest US Dairy Production, Kathryn Gillespie

ABSTRACT: This article draws on a case study of bovine life in the US dairy industry to observe the power relations and violent networks of commodification involved. I use the terms gendered commodification and sexualized violence to understand the lives of animals in the industry and the discourses that are employed to reproduce its practices. Focusing on sex and gender, concepts which have long been classic in feminist geography, this article explores the sexually violent commodification of both female and male animals in dairy production. In addition to the ways in which both are exploited for their productive and reproductive capacities, male animals are also discursively conceptualized as perpetrators of the violence against the females. This article engages with geographies of the body and animal geographies in order to extend geographies of the body to other-than-human bodies and in order to feature the body more prevalently in animal geographies. This attention to the animal body ultimately reveals the pervasiveness of sexual violence and the consequences of gendered commodification for both nonhuman and human others. 

Generally, it is difficult for those without access to an academic library account to access articles from subscription-based academic journals. I was delighted when I found out that I have 50 free e-prints from the journal to share with anyone who wants them. If you click this link, you should be able to download and access the full article. If the e-prints are already used up when you try it, feel free to email me: serenityinthestorm@gmail.com.  I’d love to hear your thoughts if you check it out.

Rosemary-Sage Butternut Squash Soup

IMG_6197

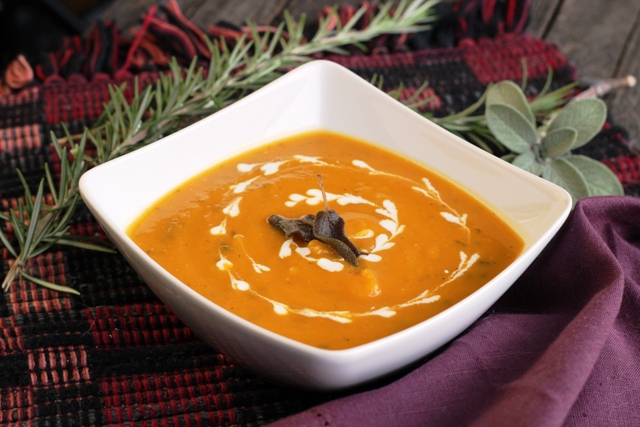
Apparently Thanksgiving is hurdling towards us quite quickly! I, for one, woke up this morning shocked that we’re already practically to mid-November. I’ll post a Thanksgiving recipe round-up soon to help with some ideas for the big day, but I thought this might be a nice main dish option. Soup is generally a non-traditional main dish offering at Thanksgiving dinner, but the flavors in this soup are right in line with the most traditional of meals. Rosemary, sage, butternut squash — this soup hits all those comfort food notes and would pair awesomely with stuffing, mashed potatoes, gravy, etc. It would be great with rolls or cornbread and big green kale salad. It’s also a super easy weeknight meal. It comes together in about 40 minutes and stores really well in the freezer or fridge. Make it on the weekend and eat it during the week or, if you’re going to try it for the holidays, you can make this the day or two before and this will be one less thing you have to think about on the day of. Note: this could easily be made with pumpkin, too.

I’d love to hear your ideas for vegan Thanksgiving main dishes if you have some!

The Recipe

1 3-pound butternut squash

1 large onion, diced

3 cloves garlic, minced

3 TBLS coconut oil

1 TBLS fresh rosemary, minced

2 TBLS fresh sage, minced

3 CUPS vegetable stock

fresh ground black pepper to taste

(optional) fresh sage leaves and vegan sour cream for garnish

For the soup: Preheat oven to 400 F. Peel butternut squash with vegetable peeler, cut the top and bottom off and cut the squash in half. Scoop out seeds and stringy insides. Dice the squash in 1-inch cubes. In a small bowl, melt 2 TBLS coconut oil and mix in half the rosemary and half the sage. Spread the squash cubes evenly on a roasting pan and drizzle the oil/herb mixture over the squash. Toss a bit to coat. Roast the squash in the oven for 15 minutes, flip the squash over, and roast for another 15 minutes. While the squash is in the oven, heat 1 TBLS coconut oil in a medium-large pot on the stove. Saute the onions and garlic until slightly soft. Add the the remaining fresh herbs and stir to combine. Saute for another 3-5 minutes to let the herb flavors bloom. Add the vegetable stock and simmer while the squash is cooking in the oven. When the squash is cooked, add the squash to the pot and blend with an immersion blender to puree. [Alternatively, you can transfer the mixture to a food processor or high-speed blender to puree the soup.] Garnish with fried sage leaves and a little vegan sour cream, if you like.

Sage leaf garnish: If you want to add a garnish of fried sage leaves, pour a generous amount of olive oil into a small pot or frying pan. Heat on medium-high heat. Drop sage leaves in and fry for only a few seconds. Pull out and lay on a paper towel. Add to the top of soup.

Don’t forget to sign up for the Vegan Delish recipe app giveaway! Deadline is Friday November 15

Find Serenity in the Storm on FacebookInstagramPinterest and/or Twitter

Giveaway: VeganDelish App for iPhones and iPads

easy recipes

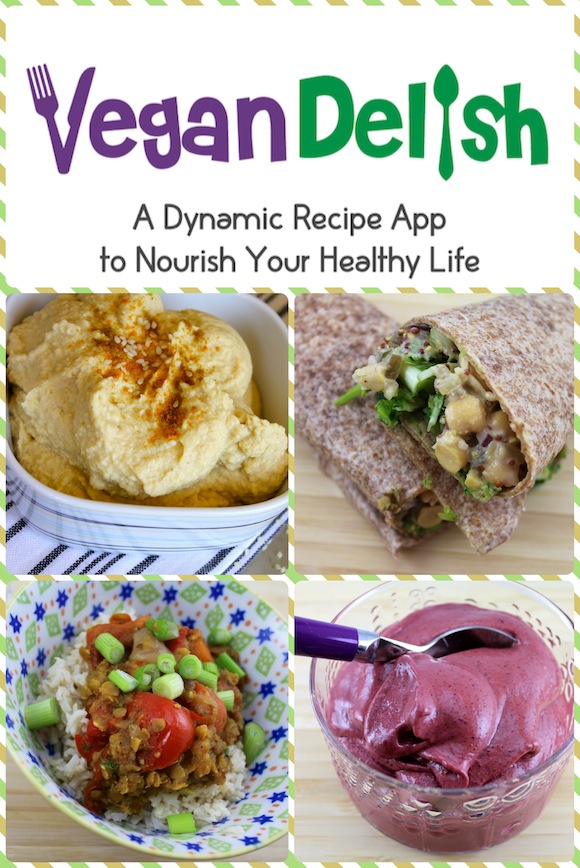
Good morning, Monday readers! Today I have a special treat for you. Carrie from Carrie on Vegan has graciously offered to give THREE Serenity in the Storm readers a free coupon code to download her awesome app, Vegan Delish. Vegan Delish is an app for iPhones and iPads that offers a ton of amazing healthy and easy plant-based recipes.

About Carrie: Carrie Forrest is a graduate student in public health nutrition, author of the popular blog, Carrie on Vegan, and creator of the best-selling app for iPhones and iPads, Vegan Delish, featuring healthy recipes using whole food ingredients. As a thyroid cancer survivor, she is keenly aware of the health benefits of a plant-based diet. Carrie has been vegan since 2010 based on her love for animals and a commitment to making the world a more compassionate place.

Carrie is an inspiration in all she does — getting a graduate degree in public health nutrition, writing her blog, creating this app, surviving thyroid cancer, and living a life that inspires countless people to adopt healthier, plant-based lifestyle choices. On top of all of that, Carrie is also a total sweetie and we’ve had the pleasure of meeting in person a couple of times. I can’t wait until our paths cross again.

But down to business! Here are the rules of the giveaway: While the app is available for download worldwide, the giveaway is limited to those living within the United States (the coupon code only works in the U.S.). Also, the app is available only on iPads and iPhones for now. If you’d like the chance to win a coupon code to download Vegan Delish for free, simply post a comment below. I will choose three winners at random on Friday November 15, 5PM PST. 

Any questions? Don’t hesitate to let me know.

Smoky Pumpkin Pasta

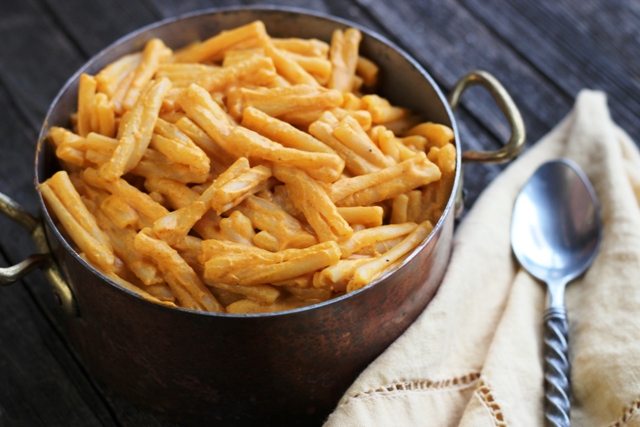
IMG_6155

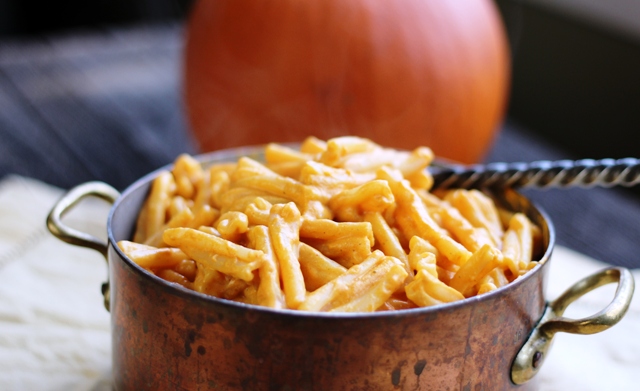
There’s something about the weather turning cold and rainy that makes me crave macaroni and cheese. I’ve tried dozens of vegan mac and cheese dishes at restaurants and at home — some better than others. This doesn’t really pretend to be mac and cheese but it fulfills that same creamy comfort food craving — featuring pumpkin and smoked paprika. This recipe was inspired by the Oh She Glows “Smoky Butternut Squash Sauce” , but I used different ingredients based on what I had around (and because I didn’t want to wait for the cashews to soak). This recipe is incredibly easy to make, creamy and smoky with a hint of garlic.

The Recipe:

Serves 3-4

1/2 CUP pureed pumpkin

1/4 CUP vegan sour cream

1/2 CUP water

2 TBLS hempseeds

1 TSP smoked paprika

1 TSP powdered garlic

1 TBLS nutritional yeast

1/2 TSP salt

fresh ground pepper

3-4 servings of pasta (you can use gluten-free if you like)

Boil a pot of water for the pasta. Cook the pasta according to the instructions on the package. In a blender, add all ingredients (except pasta, of course) and blend until smooth and creamy. When the pasta is cooked, strain it and return to the pot. Mix the sauce and pasta together and heat on low to make sure it’s nice and warm.

Enjoy!

IMG_6081

Find Serenity in the Storm on Facebook, Instagram, Pinterest and/or Twitter