Meatonomics by David Simon

IMG_4580

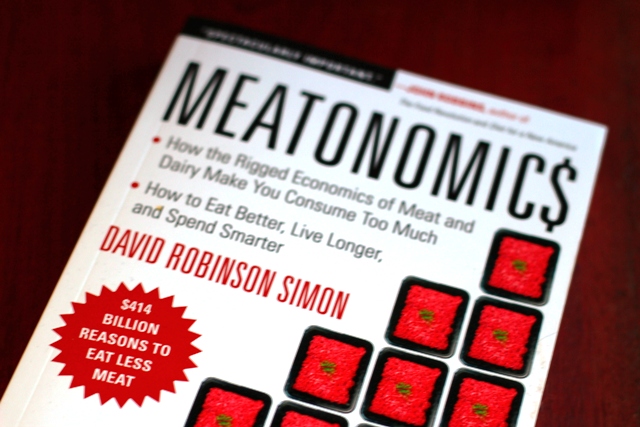
Have you all seen this book? MEATONOMIC$, by David Simon was released earlier this month. My copy arrived in the mail late last week (I had preordered it!) and I’m eager to begin reading it. I think it will be a great text to include in my Animals, Ethics and Food class and as recommended reading for anyone interested in understanding how the meat and dairy economies function.

Here’s a brief description of the book:

Few consumers are aware of the economic forces behind the production of meat, fish, eggs, and dairy.  Yet omnivore and herbivore alike, the forces of meatonomics affect us in many ways.

This is the first book to add up the huge “externalized” costs that the animal food system imposes on taxpayers, animals and the environment, and it finds these costs total about $414 billion yearly.  With yearly retail sales of around $250 billion, that means that for every $1 of product they sell, meat and dairy producers impose almost $2 in hidden costs on the rest of us.  A $4 Big Mac really costs society about $11, and regardless whether you even eat meat, you incur a share of $7 in external  costs each time someone buys a burger.

Perhaps more troubling, consumers have lost the ability to decide for themselves what – and how much – to eat.  Those decisions are made instead by animal food producers who control consumers’ buying choices with artificially-low prices, misleading messaging, and heavy control over legislation and regulation.  Learn how and why they do it and how you can respond.

Written in a clear and accessible style, Meatonomics provides vital insight into how the economics of animal food production influence our spending, eating, health, prosperity, and longevity. From MEATONOMIC$ website

The economics of the meat and dairy industries are a vitally important topic — both because of their costs (monetary, environmental, health, animal welfare, etc.) and because of the deeply problematic politics of these economies (subsidies, corporate interests, etc.).

Over the next few weeks, I’m going to be reading this book. If anyone is interested in joining me, please do and I’ll post another post with my thoughts on the text and we can have a discussion in the comments section. Like a virtual book club.

Heirloom Tomatoes with Creamy Pesto & Kalamata Tapenade

IMG_4527

The weather has started to turn rainy, which in Seattle is a sign of fall and winter coming. We’re having more and more cloudy days (which I love!) and the temperatures are cooling. But heirloom tomatoes are still the star of the farmers markets. Heirloom tomatoes taste like summer and, paired with the fresh, bright flavor of basil — there’s nothing better. Well, maybe there’s something better. Creamy pesto and kalamata olive tapenade with some fresh basil leaves might be better!

I’ve been seeing these tomato and vegetable stacks scattered around the blogisphere and I’ve been itching to try my own version before the tomatoes are done for the season. For this recipe, I made a slightly different creamier version of my raw pesto and a batch of kalamata olive tapenade. This dish’s ‘raw’ status is questionable with the addition of the tapenade (does anyone know if capers are considered raw? And I used powdered garlic instead of roasted garlic), but it’s delicious and it’s definitely a majority raw. It is rich and amazingly flavorful and the pesto and tapenade are a beautiful complement to the most delicious tomatoes out there.

The Recipe

FOR THE TAPENADE (Makes about 2 cups):

2 cups pitted kalamata olives

1/3 cup roasted garlic cloves or 1 tsp garlic powder

1/4 cup capers

1/2 cup fresh basil leaves

1/4 tsp dried thyme

1/2 Tbls lemon juice

black pepper and ground red pepper to taste

Instructions

Throw all ingredients in food processor and process until very finely chopped. Taste and adjust pepper and lemon juice to your liking. If you don’t have a food processor or blender, you can chop all ingredients very finely by hand. Note: You can roast your own garlic, but if you’re in a rush, you can buy some roasted garlic either in a jar or in the antipasto/olive bar sections of some grocery stores.

FOR THE CREAMY PESTO (Makes about 1 1/2 cups):

1/2 cup cashews

1/2 cup walnuts

1/2 cup pumpkin seeds

1/4 pine nuts

1-2 cloves garlic

2 Tbls lemon juice

1 1/2 cups basil leaves

1 cup fresh spinach

1/2 cup water

1/2 tsp salt

Note: You can use whatever combination of nuts/seeds you like. Get creative — this is just a guideline! Combine all ingredients (except for water) in the food processor and process until smooth. Add water a little at a time and process until you reach your desired consistency. If you want a pesto that is more liquid, add more water. If you want a thicker pesto, add less water.

FOR THE STACKS:

You want enough tomatoes for each person to have 4-5 slices of tomato. Choose a few different heirloom tomatoes of different colors that are all about the same size. Slice tomatoes 1/4-1/2 inch thick. Spread some pesto on the plate as the base. Add a tomato slice. Spread a layer of tapenade and add another tomato slice. Add a layer of pesto and then another tomato and another layer of tapenade. Add a few fresh basil leaves to one of the layers. Top the stack with a dollop of pesto and tapenade and a basil garnish, if you like. To eat, I recommend a fork and a sharp knife. The pesto and tapenade are plenty for at least 4-6 people. These will both keep in the fridge for about a week.

Bon appétit!

IMG_4517

Follow me on Facebook, Instagram, Pinterest and/or Twitter.


Frozen Banana Blackberry Torte

IMG_4453

Since Eric and I have been eating raw, we’ve been eating a ton of frozen banana soft serve ‘ice cream.’ If you’re unfamiliar with this delightful treat, it’s just frozen bananas in the food processor (or high-powered blender) until smooth and creamy. It’s the best soft serve ice cream I’ve ever had. I don’t know about you, but I get a mighty sweet tooth in the evenings — after dinner while we’re hanging out — and this always does the trick. It’s a satisfying, sweet and healthy dessert. You can add any other fruit in addition to bananas, too, to mix things up a bit. I’ve posted about it before here.

Last night, though, I stepped it up a notch. I’d been envisioning for a while a little torte/cake/cheesecake — whatever you want to call it — made out of the frozen soft serve with a little crust on the bottom. So last night I whipped up a little raw cheesecake type crust (it’s actually pretty much the same recipe as the crumble from the nectarine crumble with a little extra water) and a batch of banana blackberry soft serve. I used mini springform pans, but you can use kind of dish, or muffin tins with cupcake papers would be a perfect (and easy to remove!) way to serve these.

The Recipe

Makes four 4-5 inch tortes

For the crust:

1/2 cup raw cashews

1/2 cup unsweetened grated or shaved coconut

1/2 cup dried dates

1/4 cup ground flax seed

1/4 tsp cinnamon

~2 Tbls water

For the filling:

3 cups frozen bananas (in chunks)

1/2 cup frozen blackberries

In the food processor, combine all crust ingredients, except water, and process until fine. Add water and process. It should be a moist clumpy consistency that is easily pressed into the cake pan. Using whichever pans you prefer, press a thin layer of the crust into the bottom of the pans. Give the food processor container a quick rinse to remove the crumbs and process the bananas and blackberries. This should take 5-10 minutes, and will require you to push the mixture down off the sides a number of times to get it to process until smooth. When the banana mixture is smooth and creamy, divide evenly among the pans and smooth the tops. Freeze for at least one or two hours (or more) and serve with a garnish of shaved coconut or blackberries.

Follow me on Facebook, Instagram, Pinterest and/or Twitter.

Nectarine Crumble on a Cloudy Morning

IMG_4399

Morning! I woke up this morning to a foggy Seattle day and, as I was drinking my green juice and reading my blog reader, I was delighted to find that Carrie of Carrie on Vegan had posted two lovely recipes for peach crumble. Thanks, Carrie, for a little inspiration on a cloudy morning! I love peaches and nectarines and cinnamon sugary crumbly stuff. I love crumbles, crisps, cobblers — whatever you want to call them, they’re delicious. But I’ve been eating raw lately and a cooked crumble is not on the menu for me at the moment, so I was inspired to make a little raw crumble of my own this morning for breakfast. If you want to make a cooked version, head over to Carrie’s awesome recipes, but here is a raw version that you can be eating in less than 10 minutes. Eat it for breakfast, dessert, a snack… whatever! You can make this with any fresh fruit, too. Blueberries would be good, or blackberries… I used a nectarine since we didn’t have any peaches in the house at the moment. I made enough crumble for probably 4 servings, but only ate one, so I just stuck the other three servings in a container for later.

This was a beautiful way to start the day! The bright and juicy taste of fresh nectarines, the richness of the cashews, coconut and date topping and the subtle hint of cinnamon and ginger. Simply delicious!

The Recipe

Serves 4

1/2 cup raw cashews

1/2 cup unsweetened grated or shaved coconut

1/2 cup dried dates

1/4 cup ground flax seed

1/4 tsp cinnamon

1/4 tsp ground ginger

1 Tbls water

4 peaches or nectarines, sliced

In a food processor, add all ingredients except the water and the fruit. Pulse until fine and well combined. Depending on the moisture content of your dates, you may not need any water, but if the mixture is quite dry, add a tablespoon of water and pulse to combine. The mixture should slightly hold together while still being crumbly. You don’t want it to be wet. Slice peaches/nectarines (or assemble other fruit) in a bowl and crumble the topping on top. Garnish with a little shaved coconut and enjoy!

Follow me on Facebook, Instagram, Pinterest and/or Twitter.

Saoirse’s ‘Ears in the Wind’ Series

IMG_4320

It’s been a while since I’ve posted a Saoirse update. For those who might be new to the blog, we adopted a beagle from a medical research laboratory last October. The last 10 months have been incredible — seeing her adjust to life in a home, make friends with other dogs, start to trust (some!) people, and in general relax and enjoy her life as a dog. Dog parks still freak her out a little, though she’s getting more used to them, so we try to make regular visits to Eric’s mom’s house, where she has a big fenced in yard and the dogs can play together in a more relaxed and less high pressure environment (sometimes those dog parks can be a bit intense!).

IMG_4304

I’ve been wanting to take some pictures of Saoirse running to share here on the blog because it’s just a hands-down magical thing to see. Her ears are HUGE and they flap like wings when she runs. I finally remembered to bring my camera last time we went for a play date. And so here is the Saoirse’s ‘Ears in the Wind’ series.

IMG_4300

It’s been such a joy to bond with her and to get to know her personality as she shows it to us. She is a total sweetheart — extremely affectionate and loving and sensitive. She still loves to burrow in the blankets on the couch and the bed and snuggle to stay warm. And she is *funny* — I mean, downright hilarious. What a sense of humor!

IMG_4297

In addition to playing, cuddling and generally being a goofball, she *really* likes to eat. She got a urinary tract infection a couple of months ago, and while we were at the vet, we discovered that she had gained 5 pounds since we adopted her. FIVE! Yikes. Serious stuff. We’ve reduced her serving size of her delicious vegan diet and hopefully her weight will come down a bit. The accidents in the house have dramatically declined as we’ve learned to read her signals and she’s learned to vocalize her need to go outside more. Overall, things are going well and she has completely settled into life as part of our pack.

IMG_4326

Follow me on Facebook, Instagram, Pinterest and/or Twitter.

Ginger Peanut Carrot Salad

IMG_4360

We were at the vegetable stand the other day and they had organic purple carrots at 3 bunches for $1. Of course, we got three bunches and yesterday I whipped up a little raw carrot salad for lunch. I used the spiralizer, which was a bit tough with carrots — most of them turned out in little short crescent shapes, but I did get a few nice long noodley pieces. I used some of the purple carrots and some regular old orange carrots for some variation. You can, of course, make this by grating carrots, or slicing them very thinly with a knife or mandolin (you certainly don’t have to have a spiralizer to make this). The sauce for this is not raw (peanut butter is made with roasted peanuts and I honestly don’t know the raw status of tamari and brown rice vinegar!), but it sure is tasty.

The Recipe

Serves 2

2 1/2 – 3 cups of carrot (spiralized, grated, sliced, etc.)

2 Tbls ginger juice (or 1 Tbls finely grated fresh ginger mixed with 1 Tbls water)

2 Tbls low sodium tamari or soy sauce

2 Tbls brown rice vinegar

sprinkle of powdered garlic (or some finely minced fresh garlic)

1 mounded tsp peanut butter

2 green onions, minced.

In a jar with a tightly closing lid, add all ingredients except the carrots (hint: reserve a pinch of the green onions as a garnish for the top of each dish). Put the lid on the jar and shake vigorously until the sauce is well combined. Place prepared carrots in a medium sized mixing bowl and toss with the sauce. It’s nice if this can sit in the fridge to let the flavors meld, but you can also eat it right away. If you give it time to sit, give it a stir occasionally so that the sauce coats all the carrots.

IMG_4365

Follow me on Facebook, Instagram, Pinterest and/or Twitter.

The Sound of a Wild Snail Eating

IMG_4334

This morning, I woke up at 5:30 to sound of a downpour. You know, the kind of rain that beats against the roof and you can just tell that it is soaking the plants and washing away the grit and dirt from weeks (no, months) of dryness. The kind of rain that is such a welcome sigh of relief at the end of a long, hot summer.

Just as it was getting light, the rain stopped and I noticed this little snail sliding across the pavement of our driveway, heading for the garden. And it reminded me of a book I wanted to share with you all.

Earlier this summer, I read a book for pleasure (GASP! for those who know me). It felt luxurious to read something that was not for school, not for my dissertation, and not a dark story of animal suffering. The book I read was The Sound of a Wild Snail Eating by Elisabeth Tova Bailey. It’s a memoir of sorts. Through the book, Bailey is bedridden with a serious illness and a friend brings her a tiny woodland snail in a pot of violets to keep her company.  (NOTE: in order to enjoy the book, you have to suspend your discomfort with the fact that the snail was taken from its native habitat and relocated to Bailey’s nightstand…the snail is eventually returned to the woods.) As Bailey lay in bed, unable to move, she watched the snail. She built the snail a habitat with moss and plants from the woods and provided fresh portabella mushrooms for food. What she observes about the snail, what she learns about herself and her immobility, and what she learns about gastropods from books she reads as a result of her growing fascination with the snail — these are beautiful and strange and moving observations.

This book makes you think deeply about a lot of things. It makes you think about other species in a new way (even for those of us who are already thinking deeply about animals). It makes you think about the delicacy and impermanence of our bodies and our health. It makes you think about what we would see if we slowed down — like, really slowed down…like, if we were completely still and we were able to notice the world moving around our stillness.

The Sound of Wild Snail Eating humbled me. It reminded me of just how little I understand about the world, or the worlds, around me. It moved me by its simplicity, its beauty and the life of an astoundingly extraordinary tiny creature — the snail.

Raw Zucchini Pesto Pasta

IMG_4217

I guess I’m on a bit of a raw foods recipe kick on the blog. Bear with me — all I’m doing these days is writing my dissertation and eating very simple, raw foods and juices. The simplicity of my days is nice — get up, feed the animals, make juice, write for hours, walk the dogs several times a day, get in some exercise, water the garden, and relax with Eric in the evenings. Some might say the routine is boring; I love the simplicity and I find the routine productive and comforting (at least for now).

Our garden is producing a lot of zucchinis right now, which always motivates getting creative with zucchini-related recipes. We also have an abundance of basil in the garden. So it only seemed natural to whip up a raw zucchini pasta with pesto.

NOTE: To prepare the zucchini, you can use any number of methods — grate it with a box grater for short little “noodles,” use a vegetable peeler to shave off long ribbon-like pasta, or you can use a spiralizer if you have one for long curly noodles (pictured). No need to peel the zucchini first if it’s organic — just give it a rinse and get straight to making your pasta.

The Recipe

Makes 6-8 cups of prepared “pasta”

6-8 cups of zucchini (grated, ribbon-peeled, spiralized, whatever you prefer)

1 cup fresh basil

1 1/2 cups kale or spinach

1/2 cup walnuts (or other nut)

1/4 cup pine nuts (or other nut/seed)

1-2 cloves garlic

2 T nutritional yeast

2 T lemon juice

~1/3 cup water

pinch of sea salt

pinch of crushed red pepper

fresh ground black pepper to taste

Add all ingredients, except zucchini, to a food processor. Process until it becomes a fairly smooth paste. Taste and adjust seasonings as desired (hint: you may want to add more salt, lemon, or black/red pepper and you might need an extra splash of water if it’s not processing easily). In a large mixing bowl, toss the zucchini “noodles” with the pesto and refrigerate for an hour or more to let the flavors combine. You can also serve it right away, but it’s nice for the pesto to marinate on the zucchini for a while. Serve with a few grinds of fresh black pepper.

Bon appétit!

IMG_4246

Follow me on Facebook, Instagram, Pinterest and/or Twitter.

Kale Chips – Pizza Flavored

IMG_4192

When I made these kale chips, I told Eric they would taste just like pizza. When he tasted them, he was like, “Oh yeah, JUST like pizza!” Not sure if he was kidding or not. I think he might have been. In any case, they do have a nice tomatoey Italian flavor profile. Since we’ve been doing the raw food/juicing thing, I’ve been on a serious kale chip kick. Every time I go to the grocery store, I get myself a bag of kale chips and I usually eat them all in the car on the way home. At $5 for a small bag, it’s a pretty expensive habit, so I’ve started making them at home in the dehydrator. The variations on flavors/toppings are endless.

The Recipe

Makes about a 64 ounce jar filled with chips

1 very large bunch of curly leaf kale (or 2 small bunches)

1 large red bell pepper

heaping 1/2 cup sundried tomatoes

1-2 garlic cloves

1/2 cup cashews (or nuts of choice)

1/3 cup hemp seeds (or seeds of choice — sunflower seeds would be good)

juice of one lemon

1 1/2 tsp oregano

1/4 cup fresh basil leaves, loosely packed

1/3 cup nutritional yeast

pinch of ground red chili

pinch of salt

Soak sundried tomatoes for 30-45 minutes ahead of time to rehydrate. Remove seeds and stem from red pepper. Add all ingredients (except kale!) to the food processor. Pulse until it’s a nice creamy consistency, scraping down the sides periodically. Wash and dry kale and tear into bite sized pieces. In a large mixing bowl, toss the kale with the sauce. You can use your hands to massage the sauce around and make sure it spreads evenly over the kale leaves.

Spread the kale evenly on shelves of a dehydrator and dehydrate on 115°F – 125° for 8 hours. You don’t have to have a dehydrator to make these; you can also make them in the oven. For the oven: Set oven on lowest possible setting. Spread the kale evenly on a cookie sheet and crack the door while these cook.  They’re done when they’re crunchy (if anyone tries this method, it would be great if you could leave a comment below with your cooking time for these chips. Thanks!). Alternatively, you can bake on 350°F for 15 minutes or so. Store in an airtight container or large glass jar with a lid that seals well. Enjoy!

Follow me on Facebook, Instagram, Pinterest and/or Twitter.

Experiments in Raw Food: Southwest Raw Zucchini “Pasta”

IMG_4162

A lot of times I make foods that aren’t what I would call blog worthy. They’re things that I might enjoy eating in the moment, but they’re not really the kind of thing I would ever necessarily serve anyone else (you know, like those meals where you open a can of beans, pour half the can straight into a bowl, add half an avocado and eat it). Not bad, but certainly nothing to write home about. Today for lunch, I was experimenting with raw food and trying to add a little pizzazz to my routine of mostly juice, salads and fruit. We’ve got a bunch of zucchinis sitting on the counter from the garden and I decided to build a meal around those bad boys.

How I made it: I grabbed a zucchini, lopped off a chunk and, using the vegetable peeler, made ribbons of raw zucchini. I tossed that in a bowl with the juice of half a lime and a dash of ground cumin. In a separate bowl, I cut up a tomato from the garden, half an avocado, a tiny bit of onion,  and tossed it with some lime juice, a little salt, and some dried red chili flakes. I topped the zucchini ribbon “noodles” with this little avocado salsa mixture. Pretty satisfying and tasty as far as an impromptu experiment of a lunch goes. Not sure if I would make it for anyone else, though.  Is it like pasta? Is it like salad? Kind of a little like both. A nice way to switch things up.

Have a good weekend!

Follow me on Facebook, Instagram, Pinterest and/or Twitter.